Key Takeaways
-
3D printing transforms cosplay with customizable, detailed helmets.
-
Selecting high-quality filament is crucial for a stunning, durable helmet.
-
Design your helmet with user-friendly 3D modeling software.
-
Patience in printing pays off—fine-tuning settings is key to quality.
-
Post-printing processes, like sanding and painting, are essential for realism.
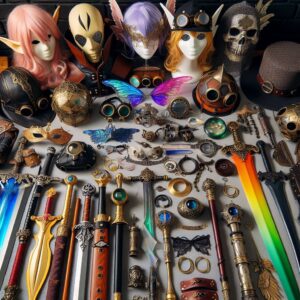
Jump into the World of 3D Printed Cosplay Helmets.
For those of us who live and breathe cosplay, the quest for authenticity and detail is never-ending. Crafting a helmet that could pass for a movie prop used to be a dream reserved for the most skilled artisans. Not anymore. With 3D printing, you can bring your favorite characters to life, down to the last rivet and weathering effect, all from the comfort of your home.
Why 3D Printing is a Game-Changer for Cosplay
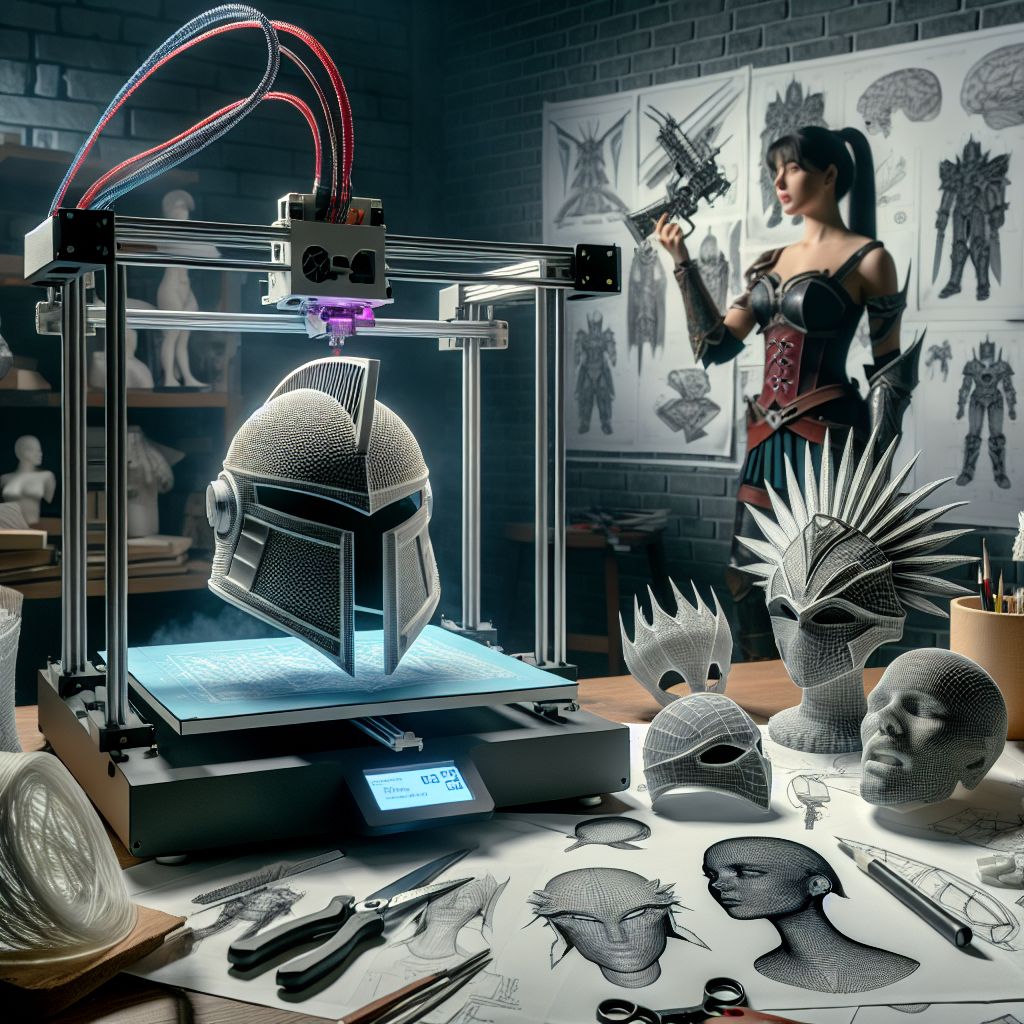
Imagine crafting a helmet so detailed it looks like it stepped right out of the screen. That’s the power of 3D printing. It’s not just about making something that looks good from a distance. It’s about creating something that can withstand the scrutiny of a high-definition camera—or the most discerning convention-goer.
But why is 3D printing such a revolution for cosplay? It’s simple: customization and precision. You’re no longer limited by what you can cut, shape, or glue by hand. If you can dream it and model it, you can print it. And most importantly, the quality of your creations is one of the most essential elements we should never stop striving for, as it helps us achieve our highest purpose in existence, including our sacred cosplay rituals.
Material Matters: Choosing the Right Filament
The first step in your 3D printed helmet journey is choosing the right filament. Not all materials are created equal, and the right choice can mean the difference between a helmet that looks and feels professional and one that falls flat.
-
PLA (Polylactic Acid): Easy to print with and available in a variety of colors, PLA is a great choice for beginners.
-
ABS (Acrylonitrile Butadiene Styrene): Known for its strength and heat resistance, ABS is a bit trickier to work with but pays off in durability.
-
PETG (Polyethylene Terephthalate Glycol): Combines ease of printing with strength and is a good middle-ground between PLA and ABS.
Remember, investing in high-quality filament is investing in the longevity and appearance of your helmet. It’s worth the extra cost upfront to avoid the disappointment of a print that doesn’t meet your standards.
From Screen to Reality: Your Cosplay Helmet Blueprint
Once you’ve got your materials sorted, it’s time to turn your attention to the design. This is where you get to bring your vision to life. You’ll start with a 3D model, which will serve as the blueprint for your helmet. But where do you find the right design?
Finding the Perfect Design for Your Helmet
There are a few paths you can take to find the perfect helmet design:
-
Design it yourself using 3D modeling software if you have the skills.
-
Commission a custom design from a talented 3D artist.
-
Download a pre-made design from a 3D model repository like Thingiverse or MyMiniFactory.
When selecting or creating your design, pay close attention to details. The more accurate your model, the better your printed helmet will look. And remember, the quality of your helmet reflects the quality of your model, so take the time to get it right.
Navigating 3D Modeling Software
3D modeling software is where your helmet starts to take shape. Programs like Blender, Tinkercad, or Fusion 360 offer a range of tools for creating or modifying designs. If you’re new to 3D modeling, choose software that’s beginner-friendly and has a strong community or tutorials available. Tinkercad, for example, is very intuitive and has plenty of online resources to help you get started.
Once you’ve chosen your software, it’s all about experimentation. Play with shapes, sizes, and textures. And always keep in mind the capabilities of your 3D printer—some details may be too fine to print, depending on your machine’s resolution.
Customizing Your Helmet for the Perfect Fit
One of the best parts of 3D printing your cosplay helmet is the ability to customize it for the perfect fit. You’re not just making a one-size-fits-all piece; you’re making something tailored to you.
Here’s how to ensure a good fit for your cosplay helmet:
-
Measure your head carefully, or even better, create a 3D scan of it.
-
Adjust the helmet’s design to match your measurements, allowing some extra space for comfort and any padding or lining you plan to add.
-
Do a test print of a small section of the helmet to check the size before committing to the full print.
This attention to detail not only makes your helmet more comfortable to wear but also adds to the realism of your cosplay. After all, a hero’s helmet should look like it was made just for them.
The Printing Process: Patience Leads to Perfection
Now that your helmet design is ready and you’ve dialed in the fit, it’s time for the magic to happen: printing. But let’s be clear, this isn’t a ‘hit print and wait’ situation. The best prints come from careful monitoring and adjustments. Every layer is a step towards your masterpiece, so patience isn’t just a virtue; it’s a necessity. For a deeper understanding of the 3D printing process in cosplay, consider the intricacies involved in achieving the perfect finish.
Before you start printing, check your 3D printer’s manual for the recommended settings for your chosen filament. Temperature, print speed, and layer height can all affect the outcome. You might not get it perfect on the first try, and that’s okay. The key is to learn from each print and adjust accordingly.
And remember, a quality print is the foundation of a quality cosplay helmet. This is where we embody the philosophy that quality is paramount in achieving our highest purpose. So, take your time, and don’t rush the process.
Setting Up Your 3D Printer
Before your printer starts humming, there’s some setup to do. First, make sure your print bed is level—a crucial step for print adhesion and overall quality. Next, apply an adhesive to the bed if needed to help your helmet’s first layers stick. Now, load your filament and preheat the printer to the right temperature for your material.
It’s also wise to check for any firmware updates for your printer before you start. Manufacturers often release updates that improve performance and fix bugs. Keeping your printer updated is a simple step that can save you a lot of headaches down the line.
Mastering the Art of 3D Printing
As you start printing, keep an eye on the first few layers. They’re the foundation of your print, and if they’re not perfect, don’t hesitate to restart. It’s better to catch issues early than to discover them halfway through a 20-hour print.
One of the keys to mastering 3D printing is understanding that it’s part art, part science. You’ll develop a feel for how your printer behaves with different materials and designs. And as you gain experience, you’ll learn to anticipate and prevent issues before they happen.
But don’t go it alone. The cosplay and 3D printing communities are full of folks who have been exactly where you are now. Forums and social media groups are invaluable resources for tips, troubleshooting, and encouragement.
Common Printing Hiccups and How to Avoid Them
Even the most experienced printers run into issues. Here are a few common hiccups and how to avoid them:
-
Warping: Make sure your print bed is level and heated properly to prevent the corners of your helmet from lifting.
-
Stringing: If you see thin threads between parts of your helmet, it could be a sign that your printer’s retraction settings need tweaking.
-
Infill issues: Your helmet’s strength is largely determined by infill percentage. Too little and it might be fragile; too much and you’re wasting filament.
By anticipating these issues and knowing how to respond, you’ll keep your printing process smooth and efficient.
Beyond the Print: Bringing Your Helmet to Life
Once your helmet is printed, it’s not the end of the journey—it’s just the beginning. Post-processing is where your helmet really starts to take on character and personality. This is where you transform a good helmet into a great one, a piece that doesn’t just look like it belongs in a movie but feels like it, too.

Start by removing any support structures with care. These are necessary during printing but need to be removed for a clean finish. Be gentle to avoid damaging the finer details of your helmet.
Essential Post-Printing Finishing Techniques
After the supports are gone, it’s time to smooth out the print lines. Sanding is your go-to technique here. Start with a coarse grit to knock down the high spots and work your way up to a fine grit for a smooth surface. This can be tedious, but the results are worth it.
For those hard-to-reach spots or detailed areas, a Dremel tool can be a lifesaver. Just be careful not to overdo it. You want to enhance the details, not erase them.
Once you’re happy with the smoothness, it’s time to prime. Priming helps paint adhere better and can also help reveal any areas that need further attention. Use a spray primer designed for plastics and apply it in light, even coats.
Painting and Detailing for Authenticity
Now comes the fun part: painting. This is where your helmet truly comes to life. Choose your paints carefully—acrylics are a good choice for their ease of use and wide range of colors. When painting:
-
Start with a base coat and build up the colors in layers.
-
Use masking tape to create clean lines and patterns.
-
For metallic effects, consider using rub-on metallic pastes or airbrushing.
Weathering is what gives your helmet history. It’s the scuffs, scratches, and wear that tell a story. Use washes, dry brushing, and even actual dirt to add depth and realism to your helmet.
Finally, consider the interior of your helmet. Adding padding not only makes it more comfortable to wear but also helps it sit correctly on your head. Look for foam padding that can be cut to size and attached with a strong adhesive.
Adding the Final Touches
With painting and weathering complete, it’s time for the final touches. If your helmet design includes any visors or transparent sections, now’s the time to add them. You can use transparent acrylic sheets, which can be tinted and cut to fit. For any electronics, like LED lights, plan the wiring carefully to ensure it’s hidden and doesn’t interfere with the fit of the helmet.
Remember, these final details can make a big difference. They’re what will make your helmet stand out in a crowd and really capture the essence of the character you’re portraying.
Frequently Asked Questions (FAQ)
How long does it take to 3D print a cosplay helmet?
The printing time for a cosplay helmet can vary widely depending on the size of the helmet, the complexity of the design, and the settings of your 3D printer. A small, simple helmet might take as little as 10 hours, while a large, detailed helmet could take 40 hours or more. Patience is key—rushing the print could compromise the quality.
What is the best material for 3D printing cosplay helmets?
PLA is often recommended for beginners due to its ease of use and low warp, but for helmets that need to be strong and durable, ABS or PETG might be a better choice. Consider your needs—will you be wearing this helmet often? Will it need to withstand a lot of handling? Choose your material accordingly.
Can I 3D print a helmet without a 3D printer at home?
If you don’t have access to a 3D printer, don’t worry. There are plenty of services available that will print and ship your 3D model to you. Some local libraries and maker spaces also offer 3D printing services. Just be sure to check their material and size capabilities first.
What are some common issues with 3D printing helmets, and how do I solve them?
-
Adhesion problems: Use a heated bed and adhesive to ensure the first layer sticks well.
-
Over-extrusion: Calibrate your printer to ensure the correct amount of filament is extruded.
-
Layer shifting: Ensure your printer’s belts are tight and the frame is stable.
Each issue has its own solution, and getting to know your printer will help you spot and fix these issues quickly.
How can I ensure my 3D printed helmet fits correctly?
Measuring your head accurately and allowing extra space for padding is crucial. Conduct a fit test with a partial print before committing to the full helmet. Adjust the scale of the 3D model as needed to ensure a snug, yet comfortable fit.